Size Considerations
Thoughts about determining the optimal size bag for your bike.
Thoughts about determining the optimal size bag for your bike.
Handlebar Bag Size:
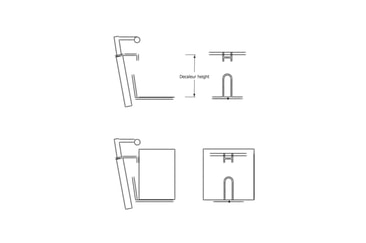
Intended use and a sharp eye for your requirements will be the first question to consider when thinking about bag size. The cockpit (handlebars, decaleur, rack, cables) arrangement then must be considered. Its unusual to have a bag that stands taller than the height of the handlebars, but there's no reason it can't happen. A short bag on a tall bike is fine too.
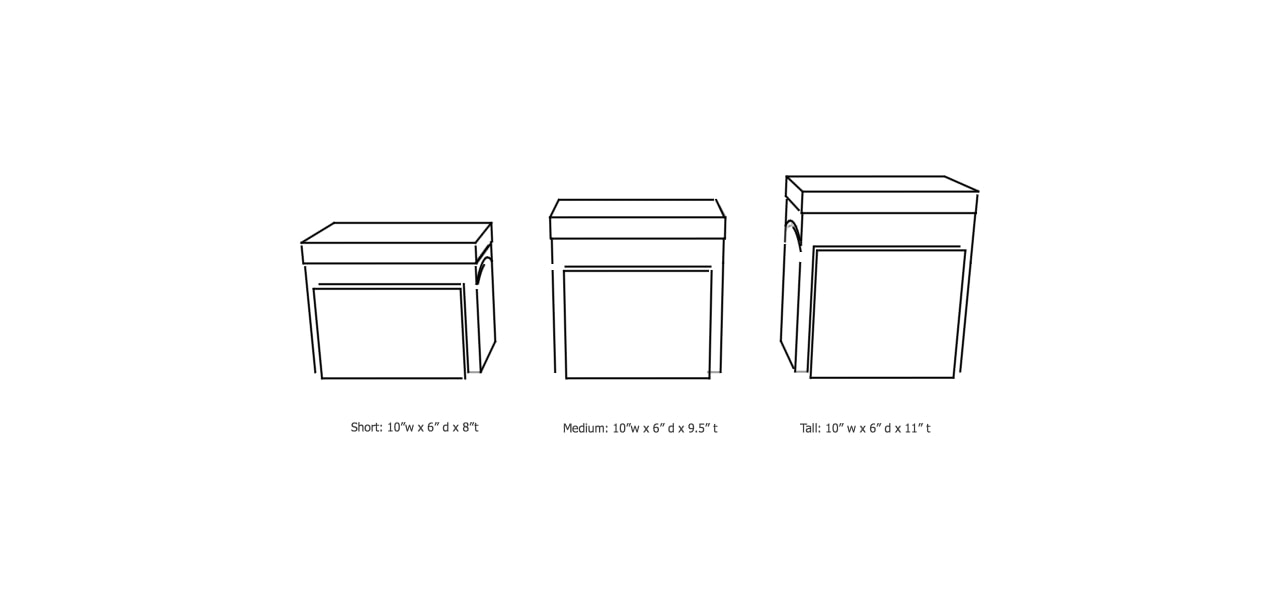
My standard bags have the same footprint, 6" x 10", and increase in height in 1.5" increments, 6", 8", 9.5", and 11". I've made bags as short as 5" and as tall as 13", and will adjust the footprint sizing if asked.
The decaleur (a bag stabilizing mechanism that typically mounts off the stem) can be a defining point that suggest bag height. Typically the decaleur bracket that mounts on the bag will land roughly centered within the 1 1/4" leather band a the top of the bag. There's nothing written it stone about this, but it's what happens most of the time, it looks right. The distance from your front rack platform up into the zone of your bar height will often define the a reasonable height for your bag.
If you encounter limitations with conventional decaleur options, consider the Dock-It™ decaleur which provides solutions for unusually tall or short bags or when other offerings don't work.
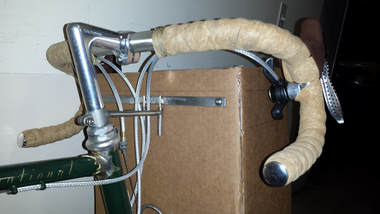
Some customers do themselves a favor by making a bag mock-up out of cardboard and placing it on their rack for a dry run--its a great way to test your assumptions about dimensions and can save you some disappointment down the road. If you do this, don't think too much about the external pockets that afix to the outside of the bag--getting the box shape proportion is whats most important. Sometimes people have particular requirements (fitting a laptop, iPad, or tire pump for example) that becomes a factor in working out the bag size, so add that into your considerations.
- These are the standard Waxwing Bag Co.handlebar bag sizes:; I've made bags as short as 5" and as tall as 13". It all depends on the needs of the rider and the space afforded by the bike and rack arrangement. If you decide to do a cardboard mock-up, start with one of these sizes. -6" d x 8" h x 10" w for a short
-6" d x 9.5" h x 10" w for a medium
-6" d x 11" h x 10" w for a tall
-6" d x 13" h x 10" w for an extra tall bag
Attachment:
Should you decide to purchase a Waxwing bag its important to consider how it will mount to your bike. There are different solutions for different types of bags; here's what you need to know:
Should you decide to purchase a Waxwing bag its important to consider how it will mount to your bike. There are different solutions for different types of bags; here's what you need to know:
Handlebar bag attachment:
Rack:
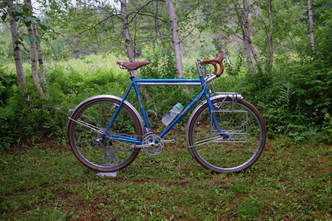
Randoneuring style handlebar bags have a roomy box shape and need to be supported from underneath-- typically by a small lightweight rack mounted on the front fork of the bike. There are a variety of rack options available from Velo Orange, Rivendell, Giles Berthoud, Compass Bicycles, Boulder Bicycles, and others including custom built models.
Decaleur:
Unless there are reasons to avoid it, a decaleur is highly recommended to fully secure the bag to the rack. (A decaleur is a non-load bearing stablizer to keep the bag from swinging from side to side, available from many of the same companies that sell racks mentioned above). In some instances the decaleur is built into the supporting rack as a single unit, in other cases it is mounted to the bike stem. Most decaleurs have the advantage of acting as a quick-release, allowing you to easily take your bag with you.
Raclips:
Waxwing handlebar bags come with a backstop sleeve that slides securely over the backstop of the rack--giving the bag a baseline hold on the rack. The next consideration is fixing the bag to the rack: for this we offer RaClips! They are excellent on/off means of affixing your bag to the rack. These two elements along with the decaleur give the bag a dependable attachment plan for your bag.
For those who do not plan to remove their bag frequently, a bag can be held to the rack with p-clamps that that are bolted through the base of the bag and around the rack tubing. This provides a super secure attachment but eliminates easy on/off removal of the bag.
Pannier attachment:
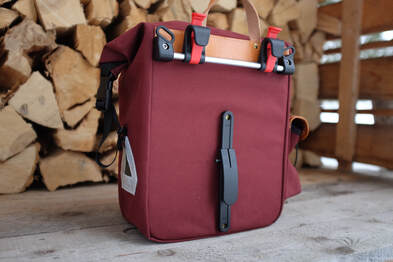
Rixen Kaul mounting hardware:
This system is the best I've encountered thus far. It creates a secure, adjustable mount that is easy to engage and remove. The potential downside is the bottom retention bracket is designed to be pulled up into a triangular rack design, but if need be the upper mount hardware could be combined with a bungee and hook to work around this. If you are thinking of using this hardware, consult me for suggestions about rack design.
This system is the best I've encountered thus far. It creates a secure, adjustable mount that is easy to engage and remove. The potential downside is the bottom retention bracket is designed to be pulled up into a triangular rack design, but if need be the upper mount hardware could be combined with a bungee and hook to work around this. If you are thinking of using this hardware, consult me for suggestions about rack design.
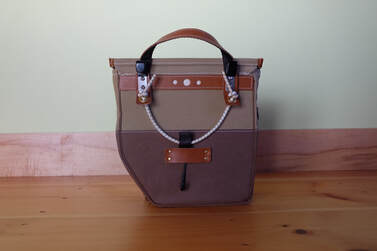
Hook-and-Bungee:
The "hook and bungee" mount system is simple and versatile. Two hooks drop over the top bar and the hook tensioned on the bungee hooks to bottom of rack. The length and tension of the bungee can be readily adjusted by moving the location of the knot.
The "hook and bungee" mount system is simple and versatile. Two hooks drop over the top bar and the hook tensioned on the bungee hooks to bottom of rack. The length and tension of the bungee can be readily adjusted by moving the location of the knot.
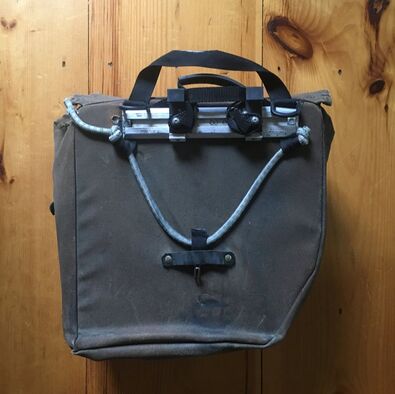
Arkel attachment hardware:
This is similar to the Rixen Kaul hardware with the benefit of aluminum construction for super durable longevity. The activation system is not as quick and easy, but the durability is hard to match for excursions beyond the reach of the usual repair ships and mail system.
This is similar to the Rixen Kaul hardware with the benefit of aluminum construction for super durable longevity. The activation system is not as quick and easy, but the durability is hard to match for excursions beyond the reach of the usual repair ships and mail system.
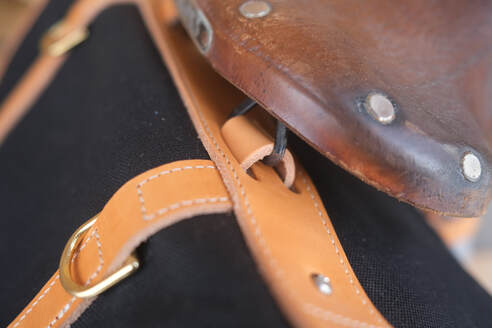
Saddlebag mounting:
Saddlebags are pretty straightforward to mount to a bike, provided you have a saddle with bag loops (two small strap-sized metal loop below the back of the saddle). If your saddle is loopless, you can purchase bolt-on loops from Waxwing here.
Generally there will be straps that come from inside the bag out strap slots which are spaced to match the conventional width of Brooks and Berthoud saddles. Simply slide the straps through the saddle loops, run them back to the interior of the bag and buckle them snug. (You can also run the straps with the buckles on the outside of the bag, but it's neater to run them from within). Last, run the third strap around the saddle post and you will be all set.
A more supported set up can be achieved with a saddlebag support. These offer the benefit of stabilizing the bag from swaying, they can hold the bag off the seat post to avoid any thigh-rub issues if the bag is too close to the rider's legs and keep a heavily loaded bag off the rear fender or tire.
Frame Bags:
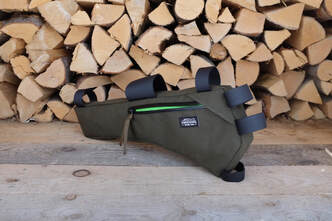
To get a nicely fitting frame bag, you'll need to create a basic template. There is much variation from bike-to-bike, even within the sizes of a given model, so worth taking the time to do a mock-up template. One-size-fits-all doesn't work here.
I suggest you take some cardboard; cut, trim and adjust it until you have found a comfortable fit within the frame of your bike. One way to do this is make it bigger than the frame opening--tape it to one side of the frame and then use a pencil to trace the inside shape. Test it for fit and adjust as needed. If its a half-bag you don't need to worry about the bottom edge. I shoot for a reasonably snug fit within the frame opening.
It's important to note obstacles like cable routing braze-ons, down-tube shifters, or whatever else might get in the way of the velcro attachment straps--put those on the template too. Picture those velcro straps and note their placement if you feel comfortable doing so. It's also important l to have whatever water bottles you might use in place (if you are planning a half-bag) so you can account for them as well--they need pull space between their resting place and the bag.
Once you've got your template, you can measure those edge lengths, note them on the cardboard, then send me a picture. I can replicate it here at full size on manila paper.

